Serprog/Arduino flasher: Difference between revisions
Jump to navigation
Jump to search
| Line 1: | Line 1: | ||
<div class="boilerplate" style="background-color: red; margin: 2em 0 0 0; padding: 0 10px 0 10px; border: 1px dotted #aaa;">'''WARNING,if you don't add the resistors, the SPI levels are at 5V, while I tried it with 3.3V chip and that it worked(but DIO was at 4.3v which was over the maximum of 4v, during all the time that the chip was connected to the programmer), it may not work for you and break the chip...'''</div> | <div class="boilerplate" style="background-color: red; margin: 2em 0 0 0; padding: 0 10px 0 10px; border: 1px dotted #aaa;">'''WARNING,if you don't add the resistors, the SPI levels are at 5V, while I tried it with 3.3V chip and that it worked(but DIO was at 4.3v which was over the maximum of 4v, during all the time that the chip was connected to the programmer), it may not work for you and break the chip...'''</div> | ||
== | == Building the flasher == | ||
This flasher require the following hardware parts: | This flasher require the following hardware parts: | ||
* An arduino uno or an arduino Duemilanove(way faster) and its usb cable | * An arduino uno or an arduino Duemilanove(way faster) and its usb cable | ||
Revision as of 19:12, 25 January 2015
WARNING,if you don't add the resistors, the SPI levels are at 5V, while I tried it with 3.3V chip and that it worked(but DIO was at 4.3v which was over the maximum of 4v, during all the time that the chip was connected to the programmer), it may not work for you and break the chip...
Building the flasher
This flasher require the following hardware parts:
- An arduino uno or an arduino Duemilanove(way faster) and its usb cable
- some wires(optionally some connectors to solder on(for easier plugin and more reliability)
a 10k resistor- 3 x 10k resistors (for the 3.3v version)
- 3 x 15k resistors (for the 3.3v version)
- A flash chip with the following characteristics:
- supported by flashrom
- SPI
- 3.3v or 5v(the arduino has a 3.3v and a 5v output, only 3.3v was tested...)
5V version
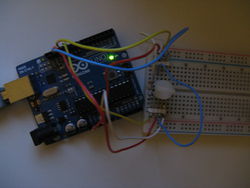
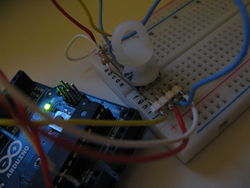
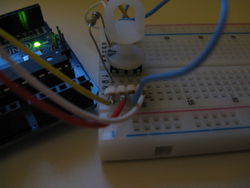
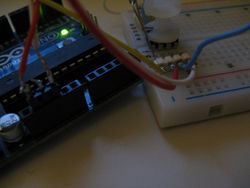
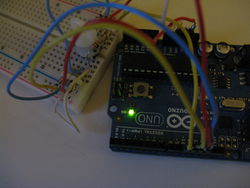
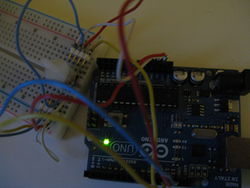
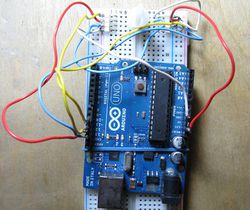
Pictures
- Pictures
-
-
-
-
-
-
-
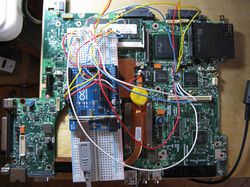
Because of the long cables flashrom had to retry once before reflashing the BIOS but at the end it worked. So don't use cables that are that long...
-
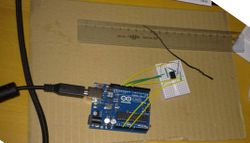
Setup by Sebastian Parborg (DarkDefender)
-
It now seem to also work without resistor...
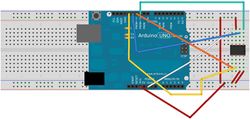
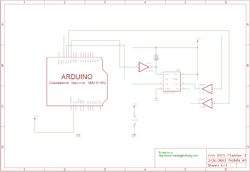
Building
Left pins of the BIOS chip:
--------------------------------------------------------
[pin1 of the bios chip] /CS<->10k resistor<->VCC

[pin1 of the bios chip] /CS<->Arduino pin10(SS, PORTB2)
[pin2 of the bios chip] DO<->Arduino pin12(MISO, PORTB4)
[pin3 of the bios chip] /WP<->VCC
[pin4 of the bios chip] GND<->GND on the power pins

Right pins of the BIOS chip:
--------------------------------------------------------
[pin8 of the bios chip] VCC<->+3.3V on the power pins of the Arduino
[pin7 of the bios chip] /HOLD<->VCC
[pin6 of the bios chip] CLK<->Arduino pin13(SCK, PORTB5)
[pin5 of the bios chip] DIO<->Arduino pin11(MOSI, PORTB3)

The Bios chip used is a W25X80.
The Arduino is an arduino uno.
3.3v version
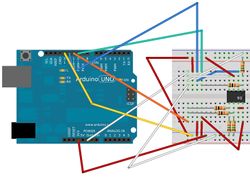
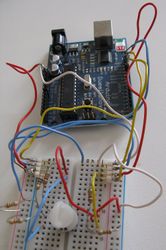
Pictures
WARNING, I was told that by Simon Inns by mail: "The 3V3 fritzing example on the Wiki (the diagram of the breadboard) is quite wrong... The 3V3 output from the Uno is shorted to GND and the CLK and DI pins of the EEPROM are connected together after the 10K resistors. Might be a good idea to fix it before you get "You broke my Uno" emails ;)"
- Pictures
-
-
Improved version by Simon Inns
Boards, software and setup
Compatibility
There are some differences between the various arduinos that are relevant for this flasher:
Architecture
- Only the AVR architecture is supported for now, because the code depends on avr-libc. In one hand that makes it portable across other non-arduino AVR boards, but it also makes it incompatible with the arduinos that don't have an AVR.
USB<->serial converter
- Some Arduinos have an FTDI USB<->Serial converter, we can achieve a very high speed of 2000000 bauds with ir.
- Some Arduino have a 8u2/16u2 instead: This is an extra microcontroller which does the USB<->serial conversion trough a firmware build on LUFA. While that brings lower cost and more flexibility, the downside is that in our case the default firmware was not written for speed over 115200. To get more speed we would need to write another firmware for it.
- Some Arduinos don't have an USB<->serial converter, like the arduino leonardo. Instead they have a native USB port.
- Most/All Arduinos have an accessible serial port on their pins. if you have an extra USB<->Serial converter, you can plug it to theses pins. BE SURE TO CHECK THE VOLTAGE COMPATIBILITY BEFORE ATTEMPTING THAT.
Voltage
- Some arduinos are at 3.3v.
- Some are at 5v. Unfortunately most SPI chips are at 3.3v at the time of writing.
Boards
| Arduinos | Hardware | User notes |
|---|---|---|
|
|
|
|
|
|
|
|
|
|
|
|
Performances
# time flashrom -p serprog:dev=/dev/ttyACM0:2000000 -r coreboot.rom
flashrom v0.9.5.2-r1541 on Linux 2.6.38-14-generic (x86_64)
flashrom is free software, get the source code at http://www.flashrom.org

Calibrating delay loop... OK.
serprog: Programmer name is "serprog-duino"
Found Winbond flash chip "W25X80" (1024 kB, SPI) on serprog.
Reading flash... done.

real	0m16.602s
user	0m0.930s
sys	0m0.000s
# time flashrom -p serprog:dev=/dev/ttyACM0:2000000 -w build/coreboot.rom
flashrom v0.9.5.2-r1541 on Linux 2.6.38-14-generic (x86_64)
flashrom is free software, get the source code at http://www.flashrom.org

Calibrating delay loop... OK.
serprog: Programmer name is "serprog-duino"
Found Winbond flash chip "W25X80" (1024 kB, SPI) on serprog.
Reading old flash chip contents... done.
Erasing and writing flash chip... Erase/write done.
Verifying flash... VERIFIED.

real	0m39.548s
user	0m2.650s
sys	0m0.000s
Required software
To make it work you need:
- A recent flashrom with the serprog protocol compiled in (most packaged versions do)
- serprog-duino which runs on the arduino
- The avr toolchain(avr-gcc, avr-libc,make etc...)
Building the software
First get the firmware source:
$ git clone git://gitorious.org/gnutoo-personal-arduino-projects/serprog-duino.git
$ cd serprog-duino
Then build it:
For a board with a 8u2 or a 16u2:
$ make u2 && make flash-u2
For a board with an ftdi:
$ make ftdi && make flash-ftdi
Running flashrom
The right flashrom arguments are explained in the help when running make.
$ make
Available targets:
ftdi, flash-ftdi:
  For the Arduinos with an FTDI
  compatible flashrom arguments: flashrom -p serprog:dev=/dev/ttyUSB0:2000000
  Other boards using an hardware USB<->Serial converter might work too.
u2, flash-u2:
  For the Arduino with a 8u2 or a 16u2
  compatible flashrom arguments: flashrom -p serprog:dev=/dev/ttyACM0:115200
So for a board that has an ftdi that would give:
flashrom -p serprog:dev=/dev/ttyUSB0:2000000
Chips
- SST25VF016B => huge issues, not recognized by the 3.3v version, had to use the 5v version which is over maximum allowed voltage, also had to lower the serial speed to 115200, ultra slow to write(seem related to the chip itself, since that with the openmoko programmer it's even slower...)...
- W25X80 works well in 3.3v mode(5v works also but it's highly not advised to use 5v)
Advantages and disadvantages
The speed isn't that great(about 3 minutes for reading+writing+verifying a 1M chip)Fixed by by Sebastian Parborg.Voltage issues( SPI levels are at 5v, it's problematic for flashing 3.3v chips...)- it is made of very commonly available parts(if you can find an arduino uno, you will be able to build it).
TODO
Find a way to lower the voltage to 3.3vFix the arduino UNO speed and reliability issuesSimply lowering the bauds as advised on the LUFA mailing list long time did fixed it.- Write a faster 8u2 firmware
- Look at other AVR targets
- Look if it's portable to other architectures (like ARM).
