Serprog: Difference between revisions
| Line 35: | Line 35: | ||
* some wires(optionally some connectors to solder on(for easier plugin and more reliability) | * some wires(optionally some connectors to solder on(for easier plugin and more reliability) | ||
* a 10k resistor | * a 10k resistor | ||
* a flash chip to flash | * a 3.3v or 5v flash chip to flash(the arduino has 3.3v and 5v available, only the 3.3v configuration was tested and is explained here but the change is trivial to make in case of a 5v chip) | ||
=== Pictures === | === Pictures === | ||
Revision as of 23:30, 9 June 2012
This page is a first draft only and serves to collect information about the serprog protocol and the programmers implementing it.
Protocol
See serprog-protocol.txt in the source tree. It is designed to be compact and allow efficient storage in limited memory of programmer devices.
There is a draft for an extension of the serprog protocol to SPI. FIXME: Link there.
Note that beside the really mandatory serprog commands, if you also implement the O_SPIOP command correctly, it should be enough for flashrom from svn to work correctly.
Hardware
AVR flasher by Urja Rannikko

The Prototype RS232 AVR parallel flash programmer Urja Rannikko was the first implementation of the serprog protocol.
FIXME: AVR source code is somewhere in the coreboot mailing list archives...
AVR flasher by eightdot
FIXME: Link?
Arduino Mega flasher by fritz
Arduino Uno flasher by GNUtoo
This flasher require the following hardware parts:
- An arduino uno and its usb cable
- some wires(optionally some connectors to solder on(for easier plugin and more reliability)
- a 10k resistor
- a 3.3v or 5v flash chip to flash(the arduino has 3.3v and 5v available, only the 3.3v configuration was tested and is explained here but the change is trivial to make in case of a 5v chip)
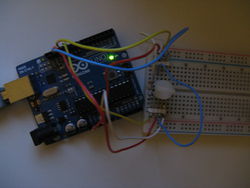
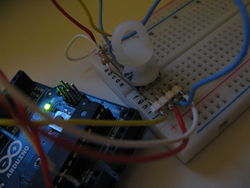
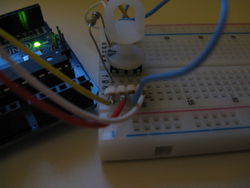
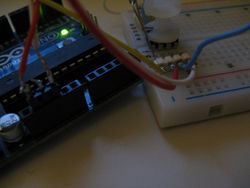
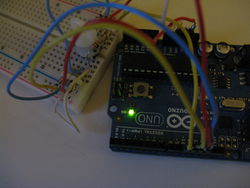
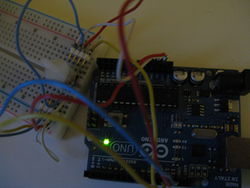
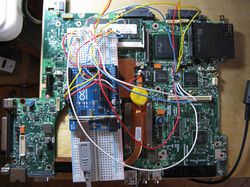
Pictures
- Pictures
-
-
-
-
-
-
-
Because of the long cables flashrom had to retry once before reflashing the BIOS but at the end it worked. So don't use cables that are that long...
Building
Left pins of the BIOS chip:
--------------------------------------------------------
[pin1 of the bios chip] /CS<->10k resistor<->VCC

[pin1 of the bios chip] /CS<->Arduino pin10(SS, PORTB2)
[pin2 of the bios chip] DO<->Arduino pin12(MISO, PORTB4)
[pin3 of the bios chip] /WP<->VCC
[pin4 of the bios chip] GND<->GND on the power pins

Right pins of the BIOS chip:
--------------------------------------------------------
[pin8 of the bios chip] VCC<->+3.3V on the power pins of the Arduino
[pin7 of the bios chip] /HOLD<->VCC
[pin6 of the bios chip] CLK<->Arduino pin13(SCK, PORTB5)
[pin5 of the bios chip] DIO<->Arduino pin11(MOSI, PORTB3)

The Bios chip used is a W25X80.
The Arduino is an arduino uno.
Software
Performances
# time flashrom -p serprog:dev=/dev/ttyACM0:2000000 -r coreboot.rom
flashrom v0.9.5.2-r1541 on Linux 2.6.38-14-generic (x86_64)
flashrom is free software, get the source code at http://www.flashrom.org

Calibrating delay loop... OK.
serprog: Programmer name is "serprog-duino"
Found Winbond flash chip "W25X80" (1024 kB, SPI) on serprog.
Reading flash... done.

real	0m17.923s
user	0m0.990s
sys	0m0.000s
# time flashrom -p serprog:dev=/dev/ttyACM0:2000000 -w build/coreboot.rom
flashrom v0.9.5.2-r1541 on Linux 2.6.38-14-generic (x86_64)
flashrom is free software, get the source code at http://www.flashrom.org

Calibrating delay loop... OK.
serprog: Programmer name is "serprog-duino"
Found Winbond flash chip "W25X80" (1024 kB, SPI) on serprog.
Reading old flash chip contents... done.
Erasing and writing flash chip... Erase/write done.
Verifying flash... VERIFIED.

real	1m8.778s
user	0m4.610s
sys	0m0.000s
Required software
To make it work you need:
- flashrom from svn
- serprog-duino which runs on the arduino
- The avr toolchain(avr-gcc, avr-libc,make etc...)
Building the software
$ svn co svn://flashrom.org/flashrom/trunk flashrom
$ cd flashrom && make
$ cd ../
$ git clone git://gitorious.org/gnutoo-personal-arduino-projects/serprog-duino.git
$ cd serprog-duino && make && make upload
Running flashrom
./flashrom -p serprog:dev=/dev/ttyACM0:2000000
Advantages and disadvantages
The speed isn't that great(about 3 minutes for reading+writing+verifying a 1M chip)- The speed is now much better thanks to a patch by Sebastian Parborg.
- it is made of very commonly available parts(if you can find an arduino uno, you will be able to build it).
InSystemFlasher by Juhana Helovuo
This is one uses a modified serprog version to talk to SPI devices via serial over USB. Details can be found in the coreboot wiki and in this coreboot mailing list thread.
atmegaXXu2-flasher by Stefan Tauner
Like the InSystemFlasher this one uses LUFA on an AVR microcontroller to tunnel the serial data over USB. To be updated when flashrom's serprog module has the needed changes merged to do SPI communication.

